
Bringing Math to a 6th Grade STEM Class through 3D Printing
Submitted by:
Nora Helf, Sanford Middle School teacher and Augsburg College alum
Dr. Matthew Haines, Associate Professor of Mathematics, Augsburg College
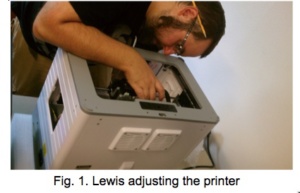
Lewis Istok, Augsburg undergraduate, preparing to teach grades 5-12 mathematics
This article briefly describes the beginning of our collaboration (that of a middle school teacher, a college math professor, and an undergraduate preservice teacher) and also describes one of the projects we created with the help of the MCTM.
The Connection
In 2015, Nora Helf, Sanford Middle School teacher, organized free professional development sessions for teachers. The workshops, Making: Small to Big, held at Augsburg College, centered around using software and hardware for classroom purposes. During these sessions, Nora connected with Augsburg math professor Matt Haines. Matt teaches preservice teachers at Augsburg and has brought 3D printing into the instruction of some of his math courses. Discussions between the two led to the collaborative idea of bringing mathematics into Nora’s sixth grade coding class through 3D printing.
Teacher Incentive Grant
Nora and Matt submitted a successful Teacher Incentive Grant to purchase a 3D printer for Nora’s classroom, enabling students to design and print while engaging in mathematical concepts. One goal of the grant was to take student 2D designs and create tangible 3D objects from them. Using Computer Aided Design (CAD) software is, in itself, a way to support the development of a student’s visual relationship of 2D and 3D objects. However, the inclusion of physical models more concretely develops the visual relationship. Nora and Matt proposed to develop a multi-day project to more strongly connect the coding course with 5th and 6th grade mathematics measurement standards (area, perimeter, surface area, and volume) and foreshadowing some 7th grade standards (circle area/circumference and motions on coordinate grids). The grant funds were used to purchase a FlashForge Dreamer 3D printer and PLA filament. Without these funds, the project would not have happened.
 Connecting with Preservice Teachers
Augsburg undergraduate Lewis Istok joined the team to help with the CAD software and printer and to participate in the development of the week-long module. Lewis is a mathematics major, working towards his grades 5-12 mathematics teaching license. Over the summer of 2016, Lewis researched the ways in which 3D printing has been incorporated into mathematics education throughout the world.
Now the team consisted of three members: an experienced middle school teacher of coding, a math professor who works with preservice teachers and teacher professional development, and a soon-to-be licensed teacher of mathematics versed in others’ uses of 3D printing for teaching mathematics. Each of the team members learned from the others in the collaboration.
The Unit
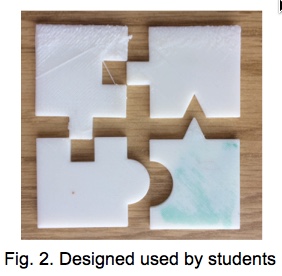
Overview. Students worked in groups of 3 or 4 to design and 3D print “interlocking” puzzle pieces. Students learned Tinkercad software and used it to prepare the puzzle pieces for printing. Students used the printed pieces to answer questions about cost, volume, and surface area.
 Prep – Pre-Unit. Students learned about 3D printing prior to the start of unit through videos and discussions. Daily warm-up questions included questions asking students to contrast 2D versus and 3D attributes.
Day 1: Pretest. Students in the three sections of the STEM course came from various mathematical backgrounds, so we gave them a “pretest” assessment on the first day of the module to gage students’ working knowledge of area, perimeter, surface area, and volume. When planning the unit, we connected with math teachers at Sanford and the MN standards to verify which content the students had been exposed to.
Days 2, 3, and 4: Learning Software. Students worked on small tutorials that focused on the mechanics of using Tinkercad (https://www.tinkercad.com/). They designed objects and practiced uploading the objects to MyMPS. The skills learned in these days were: searching for files, moving shapes, rotating shapes, aligning shapes (in middle of puzzle piece and with edge of puzzle piece), grouping shapes, using the ruler tool, adjust the dimensions of shape, naming and saving files, and downloading files.
 Day 5: Examine Design and Create Design on Tinkercad. Teams were given designs for 4 puzzle pieces on centimeter grid paper. Students approximated the area and perimeter of each piece. Since some pieces incorporated semicircles, students were required to approximate the perimeter and area of those objects. Students then created their assigned piece on Tinkercad and uploaded the file for printing.
Weekend break – intended for time to print.
Day 6: Volume Activities. Students were given their puzzle pieces. They paired up within their groups of 4 and determined which piece would cost the most to print. Then all 4 students came together and placed their pieces from cheapest to most expensive and provided reasons. Finally, the students were asked to calculate the volume of each piece using the formula for the volume of prisms that they had been studying: Volume=(area of base)x(height).
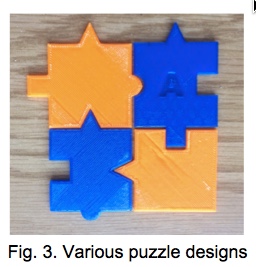
Beyond the Unit. Students continue to practice math vocabulary and Tinkercad skills in subsequent design projects such as designing a mascot for the classroom.
Two Challenges
Printing speeds: In this first attempt to use the 3D printer to connect with math content, we began with grand plans that, in the end, we simplified significantly. The rate at which the printer printed made it time consuming to print a piece for each student, nearly 100 students. In anticipation of that, we had the students work with the same 4 puzzle shapes and printed the shapes beforehand.
To address the software and printer speeds in the future, we may create off-set units so that each class period does 3D prints during different weeks. Creating an activity where there is one print per team instead of multiple prints per team could also help reduce the print time.
Tinkercad: Small software errors caused trouble for a few students. Fortunately, during the class sessions, Lewis was able to focus on helping students who stumbled upon the software glitches to find workarounds. At the same time, other adult volunteers (some parents) helped the other students. Tinkercad supports a classroom environment, but requires planning to set up anonymous accounts for each student (anonymous to Tinkercad and accessible to the instructor). We also simplified the use of Tinkercad by creating and sharing a premade template for the pieces. This allowed every single student to be successful in the creation of their puzzle piece. Students who finished early helped other students complete their designs and then were given additional creative design challenges incorporating the vocabulary of math shapes.
In the Future
 We are excited about further collaboration where additional preservice teachers help with the implementation of math-focused 3D printing activities. We envision 3D printing and design as a way for Nora’s sixth grade students to experience success in transferring mathematical skills to engaging activities. The Incentive grant helped offset the startup costs for our projects, but, of course, did not create time in which to learn, plan, implement, and revise. If you are considering incorporating 3D printing, we recommend seeking others with varied backgrounds and experiences. We found that this made a rewarding learning experience for us, and it led to a richer project. We look forward to working on more lesson creation and, implementation, and using the resource of pre-service teachers to help. We look forward to working together to design and implement other ideas of incorporating Math standards into coding and STE activities, such as analyzing data of various team-designed and 3D printed catapults.
Great post! Awesome learning going on!